Below is the guide how to DIY replace all the bulbs in Toyota Vios’s Air Conditioner panel. Read the tips before you get started the DIY project!
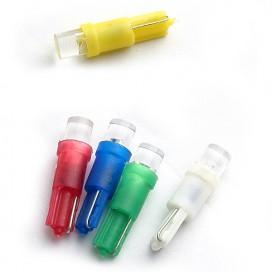
Bulb size that required: Bulb size for AC panel: T4.2
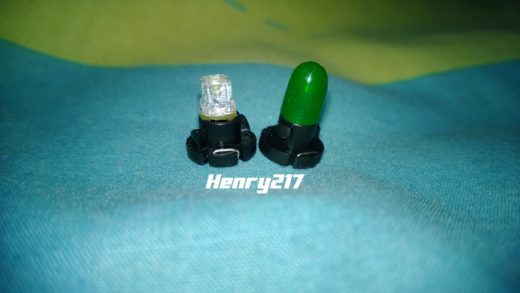
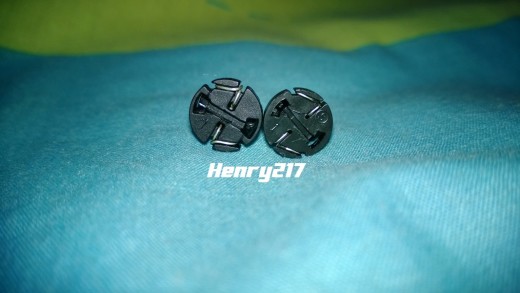
AC Panel bulb replacement
Before we get the DIY project started, user has to turn the temperature knob switch to OFF position, fan speed to ‘0’ and leg air con controller to only air con (basically everything turned in OFF position).
Next, we remove the V panel starting from the bottom part.

Remove 3 pins from each side starting from the bottom to top of the dashboard; you may need to apply some force to pull it out in your first attempt.
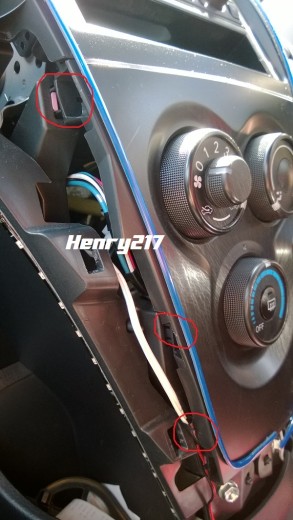
There are clips behind every dial; you may need a small screwdriver to make it out. An alternate way to remove them, push the dials from the side as shown in the picture below, either push from the left or vice versa.
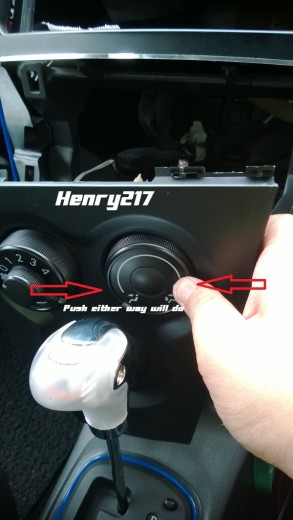
I shall start from air-con speed dial on the left side first.
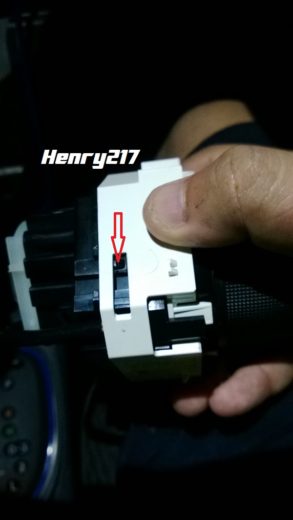
Remove the cable connector by pressing the middle and pull it out as shown on below.
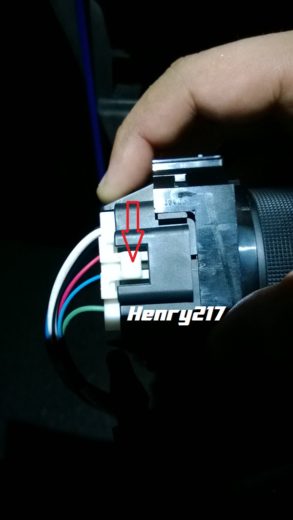
Continue to remove the next cable behind which controls the internal and external air. Use a screwdriver or your car key to push into the arrow direction as shown on picture.
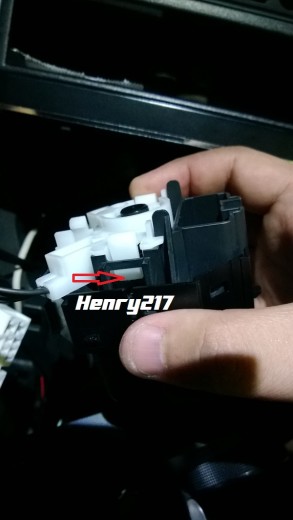
Once it is being removed, you can spot the bulb straight away. Use a flat head screwdriver and turn it anti-clockwise to loosen the bulb and remove it.
Be sure to plug the 1st cable you removed at the start to test whether the LED is working before you reassemble it back!
Turn on your car light will do. Just plug and play, if it doesn’t work, means the positive and negative polarity are placed opposite; Just turn it 180 degrees and test it again.
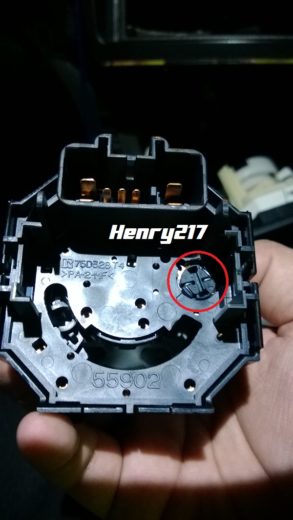
Moving on to the 2nd dial (leg air con controller), give a gentle press on the arrow pointed part and the cable can be removed easily. Take note DO NOT remove the behind part! And make sure it is turned to the left end before you continue to next step.
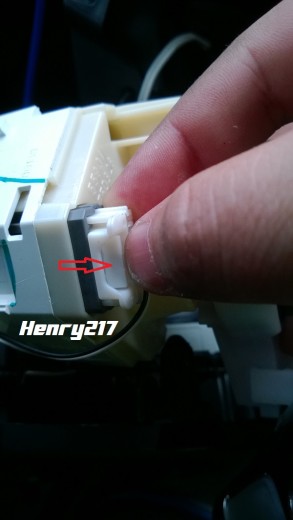
Push out the clips from all 4 sides using a screwdriver. Try not to damage or break the clips.
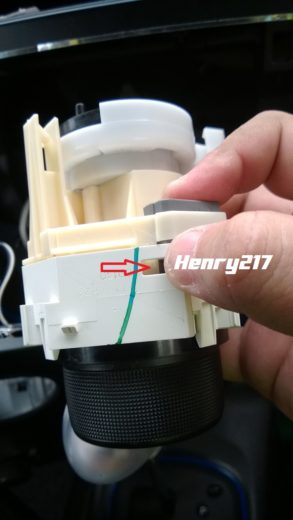
Once it is removed, you should see the gears and the bulb. Now here is the tricky part, look closely to the gears, you should notice that there is a ‘V’ shape in both gears, be sure they are at the same line when you reassemble it.
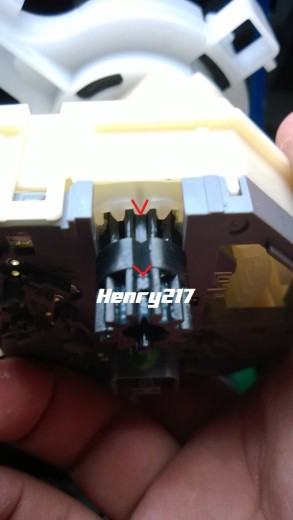
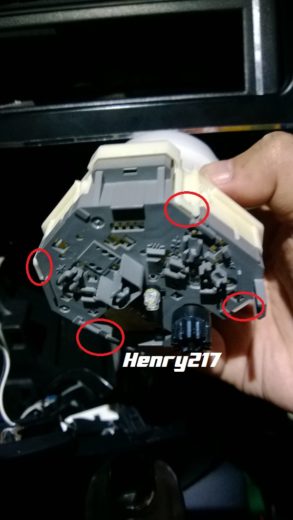
Now, remove the 4 clips around it with finger nail as highlighted in the picture. After it is removed, you will be able to reach the bulb and remove it. Do remember to connect the cable to test the LED before reassemble.
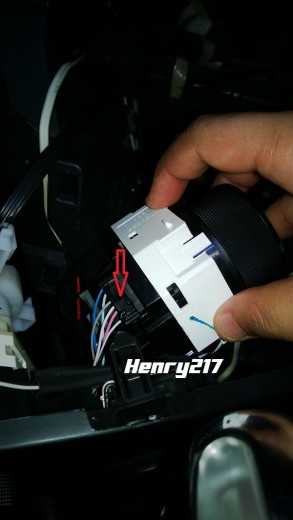
Now comes the last temperature dial, removing the cable is just the same way as previous dial, gently push down the button and release it as shown on the picture.
4 pins, 1 in each side, remove all of them and the black and white plastic will be separated as shown below. You can actually see the bulb and the gear too.
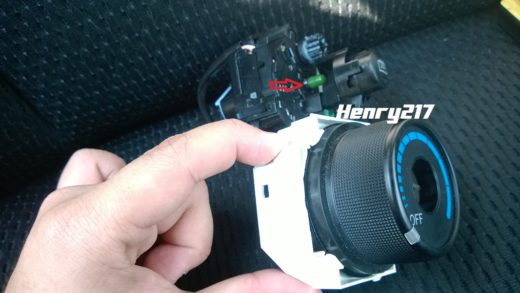
Again, make sure both gears are in the same line under ‘V’ marking; also ensure that the temperature is set to OFF.
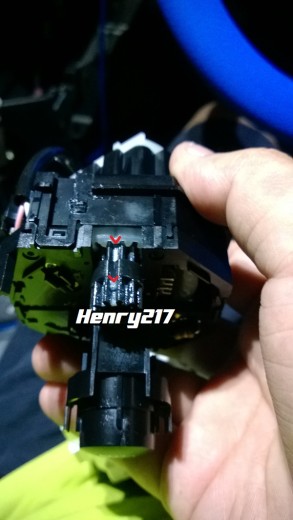
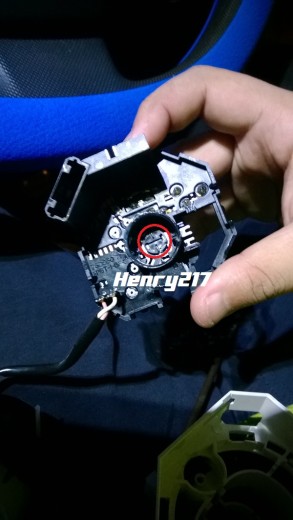
Remove 4 clips all around each sides and both base will be separated. Turn it around and you will see the bulb right below the knob.
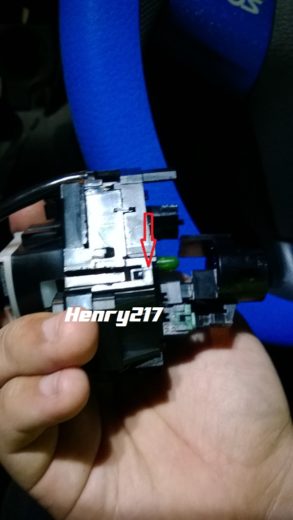
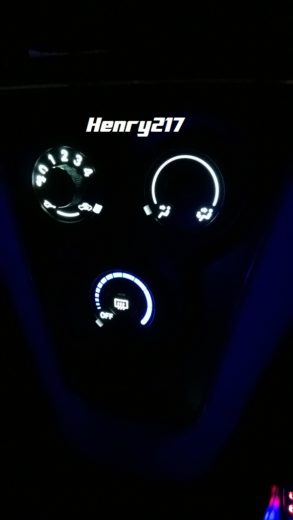
The DIY project completed! The Toyota Vios AC panel is shine brighter like a diamond~
Tips
- Mark a small note on the T4.2 base for easy reference; so that user aware the side of the LED.
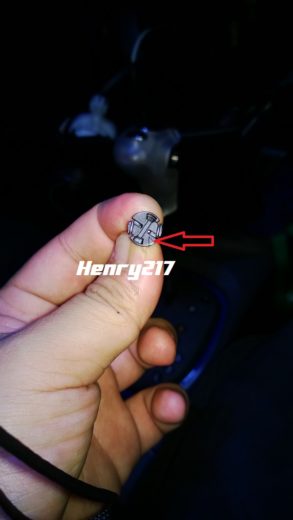
- If the LED doesn’t light up in both directions after swapped, this means the metal piece is not in contact with the copper circuit. You may use a screwdriver and adjust out the wire so that the wire has bigger contact point to the copper circuit.
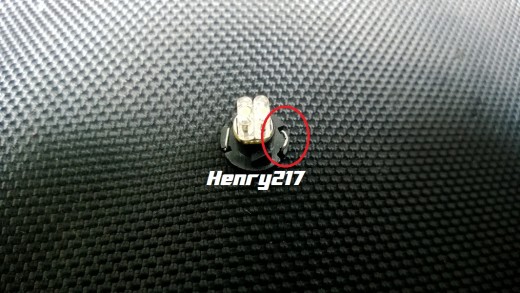
- If you want to purchase a T5 LED, make sure you purchase those with a plastic leg and the shape is same as T5 bulb. The type I bought could not fit in nicely and it can move easily, I couldn’t tighten it even after pushing the bulb fully in. The bulb do not share the same shape and socket design.
Result:
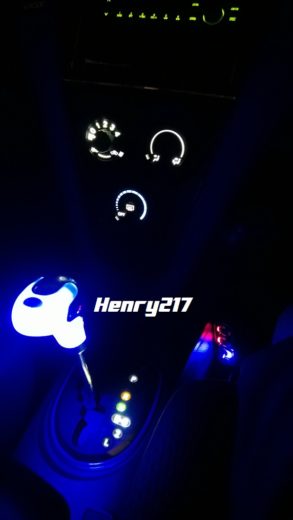
Credit this DIY article and photos to Henry 217 🙂
Checkout the another article from Henry about replacing the Gear’s bulb at here: http://www.carreviewsncare.com/do-it-yourself-replacement-for-toyota-vios-gear-panel-bulb/
Don’t forget to give us a ‘Like’ at bottom of the post 🙂
Hello. Where can I buy the a/c control panel. Black just like the one in the picture?
Hi Could I know where can I purchase this T4.2 bulb in Singapore?
Hey James, I would suggest you get from Aliexpress.com
I get mine over there 🙂
hi..may i asked from where did you buy the glow gear knob? and how much..look great =)
Hi Lor,
Henry who did it… You may ask from him. The contact attached is in this post 🙂
thanks for the reply but i cant find the contact or email of henry =(
The one that says 1 2 3 4 for fan speed on my vios s spec, only comes on every time after I tap 2 3 times. ..The bulb spoilt or came loose..Every single times..8 year old vios…These bulbs are they being sold in normal shops where can I buy it? Dun think it’s sold in supermarket ?
this bulb somehow is not a common bulb, thus some accessories shop dont have this bulb.
you may want to search in Lelong.com.my or taobao.com to get the bulb
Hi Kelvin,whr cn purchase T4.2 bulb?thx
you can refer to Henry (refer below comment), he is selling those bulbs. 🙂
Dear Mr.Kelvin,i had an error with my spedometer and AC dial lamp won’t turn on at once,and i already check every fuse on the engine bay also in the cabin left side of a passenger front seat but theres no damage on it..this happen when i replace my old headunit to a custom ex honda,i think it dont make any connection on the wire but this happen,so i hoping if you have any clue for this trouble please help me..thank’s
Hi Fibru,
thanks for drop by.
Since this issue happened after you changed your headunit, I would suggest you do the reverse engineering.
Remove back the headunit that you installed, and inspect the wiring and try to turn ON the AC dial lamp and speedometer.
I hope this helped you.
See you around again.
Hi Kelvin, thanks for the useful tutorials for DIY panel.
Just to clarify i brought the T5 bulb instead of the T4.2 bulb may i know if it’s compatible?
& however i encounter some problem like after replacing the bulb and reassemble back the ‘leg air con controller’ the panel light looks DIM instead of bright. but i check the bulb before i reassemble it looks very bright. any idea why?
and lastly i having abit problem turning the knob of the ‘leg air con controller’ & ‘temperature dial’ while turning it’s wasn’t too smooth. may i know is it because i didn’t stick to the ‘V’ marking lining?
Pls advice.
Hi Jayden,
thanks for dropped by.
Firstly, the T5 and T4.2 bulb has different fitting connector size. You might facing the difficulty when perform the installation on different connector size. Functionality wise, it should be working the same way.
2nd query: The light is dimmer, might due to bad contact or connection to the socket between the bulb and the connector. Again, it might be due to bad fitting, or due to different size of bulb.
3rd query: The turning knob wasn’t smooth might be due to bad assembly from the different size bulb that you are using. The V marking lining wasn’t really contact with the knob.
To solve your issue, is better you get the right size of the bulb 🙂
Hi Kelvin,
Thanks for the reply. finally the T4.2 arrived after i order it online 3 weeks back. as locally i was’t able to find any retail shop selling it.
Finally get it working and the light is bright enough, as it could due to the different bulb size. but however now i got another problem the ‘Temperature dial’ the smaller bulb is not working when i press it in. could it be i damage the connector/cable during dismantling time? pls advice, thanks
Hi Jayden,
nice to see you again.
you may want to check if the wire or contact from the smaller bulb is touching/contacting the copper from the ‘Temperature dial’ circuit.
Hope this suggestion can help you resolve the problem.
Hi! Your blog is very I formative. Thanks a lot for the tutorials. Now I can Diy for my vios. Just need to ask, where and how much does the light bulb costs? I’m in kl. Thanks.
Hi,
thanks for drop by.
I am not familiar with KL area, let me get my buddy from KL area to respond to you.
Stay tune 🙂
Hi OAKLEY, I’m the original author here, I have extra for sale, if you want them, I can install it for you at fixed area. Drop me an email
Hi Henry. Sorry for late reply. I did find some at Jln Pasar in KL, but the shape is something like shown in tips 3, not like the T4.2 shown. Do you still have stock?
hi henry from where and how much you puchase the glow gear shift knob?
Dude u r simply amazing man… amazing!
nah, I wished I am amazing…
I am just an ordinary people haha 🙂