My older Daytime Running Lights were broken with 2 broken LEDs some time ago. I bought them at quite a cheap price anyway, which is roughly cost me RM12 from the Brothers Accessories Shop in Bukit Mertajam, Penang. I am not sure why the DLR is broken but I never expect much from a China brand, after all the cost is too cheap for good quality product.
Yesterday, I went to 99’s Accessories Shop in Bukit Mertajam to buy another new pair of Daytime Running Lights that costed me RM32.
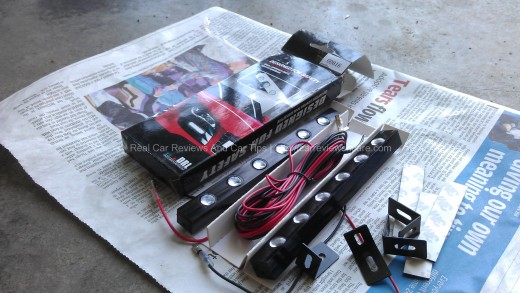
These Daytime running lights with 6 LEDs come with an aluminium casing which ensure the best heat dissipation and is 100% water proof. The package comes with 2 pieces of Daylight running lights with 6 LEDs each, four pieces of 3M double sided tape, 2 sets of red and black wires and 4 pieces of adjustable holder for the DLR.
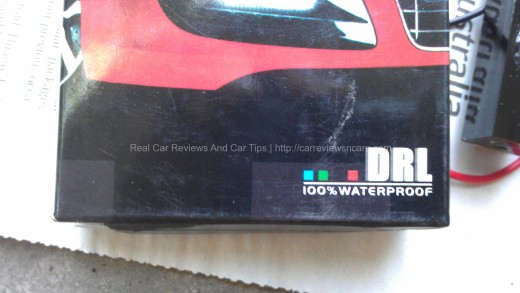
Even though the packaging stated the DRL is 100% water proof, but my personal experience has taught me these aftermarket product doesn’t really give what it has stated on the label.
Thus, I’ve decided to seal the DRL light with waterproof sealant. I bought this Auto Sealant which cost me RM20 from ACE Store, at Queensbay Mall.
Step by Step How to Apply the Water Sealant around the Daytime Running LEDs
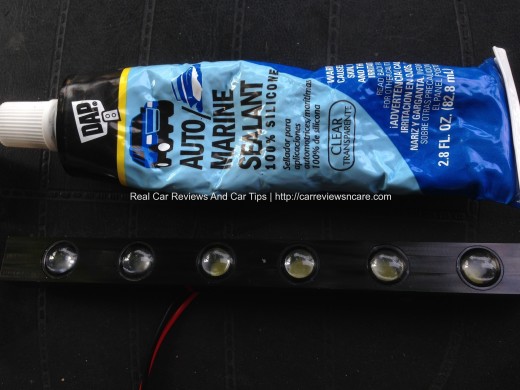
1.Apply the sealant at the every possible gap where water may slip in using toothpick.
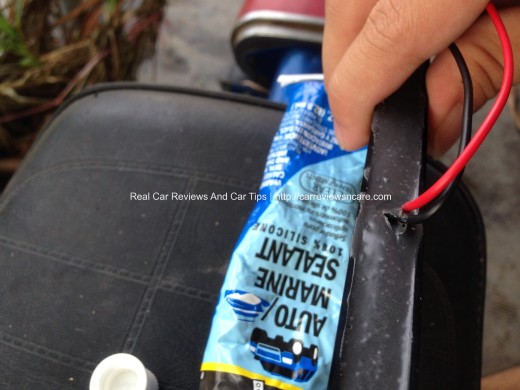
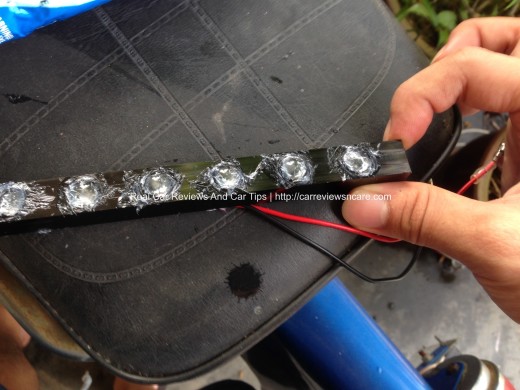
2.Then wipe off the excess of the sealant on the Day Light Running LEDs with clean tissue papers.
DIY Daytime Running LEDs Installation on the Toyota Vios
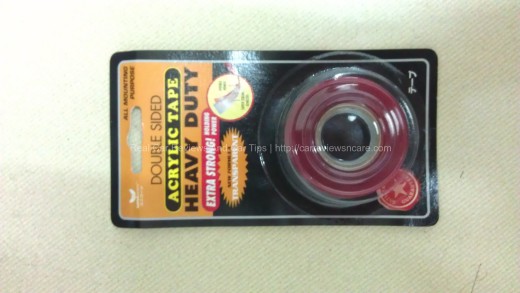
3. Then we will proceed to attach the Daytime Running LEDs to the car. Instead of using the provided 3M tape from the DLR, I used the acrylic foam double sided tape purchased from DIY shop.
The reason is because the acrylic foam double sided tape is much stronger compared to 3M tape and 3M tape must be used together with Adhesive Primer to have strong holding power. Acrylic foam double sided tape can be used without Adhesive Primer.
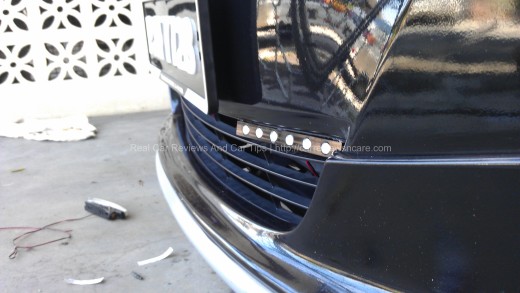
4. Technically, installing the Daytime Running Lights is easy and pretty straight forward.
All we have to do is to attach the DLR on the car and connect the DLR wires to source and ground. But still, it took me more than 3 hours to complete the wire dressing and attached the DLR on my car’s bumper. Phew it was tiring to perform the installation but the end result was worth for it.
This DIY did not required any wire cutting:
I connected the Day Light Running LEDs (DLR) source (positive +) directly to one of the fuse box’s cables which will turn on the circuitry once the ignition key is ON state. The grounding (negative -) source is connected to the chassis grounding of the car.
Refer below image to where I connected the positive “+” source:
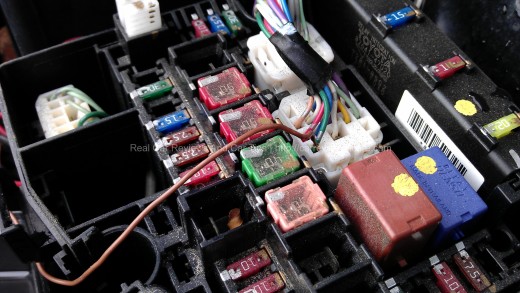
Refer below image to where I connected the negative “-” source:
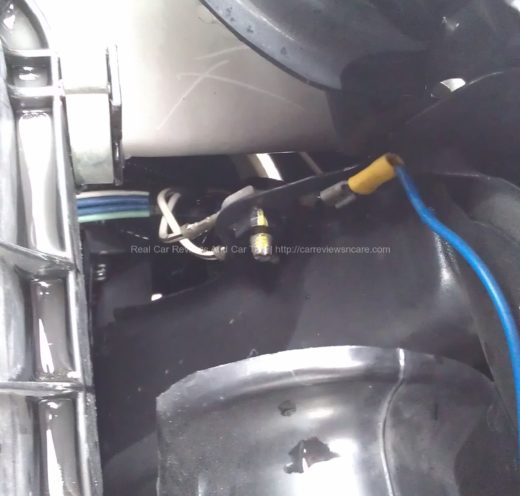
The negative wire can be connect to anywhere in the car body.
Ta da! DIY daytime running light installation is completed. The DLR lights will turn on when the ignition switch is turned ON and the DRL lights will turn OFF when I turn off the ignition switch.
This type of DLR lights are indeed very BRIGHT and it doesn’t looks bulky on my Toyota Vios.
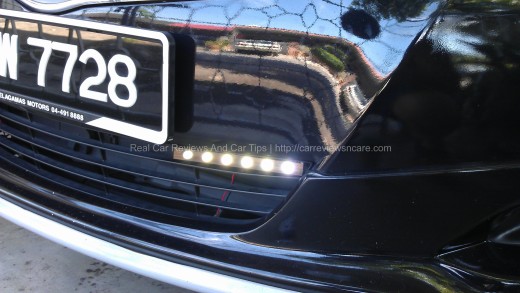
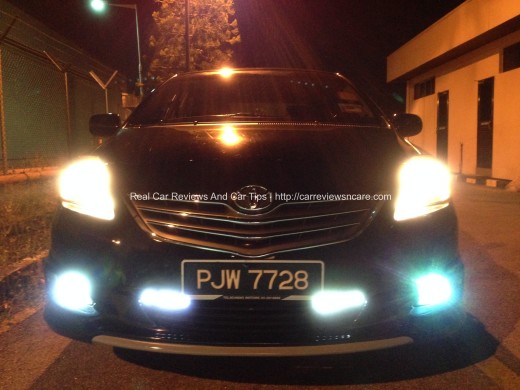
The Daytime Running LEDs (DLR) still works fine on my Toyota Vios even after almost 5 years (16th October 2014) of using it!
Don’t forget to give us a ‘Like’ at the bottom of the post


Hi, DIY is so much cheaper than have it fix at Toyota service center. Seems like you are good in it. Can you share is it the same to Vios 2020 ?
LOL, I need a physical car, Vios 2020 to show you
Can you make a tutorial about changing Vios front headlamp T10 bulbs? Thanks
Hi Heng,
thanks for the comment. Yes, I will workout the T10 bulbs tutorial, but you gotta wait me to purchase the bulb first
Ok. Thanks for reply (Y)
Hi, DIY is so much cheaper than have it fix at Toyota service center. Seems like you are good in it. Can you share is it the same to Vios 2020 ?
hi, may I know if I will need to detach front bumper out before connecting the wires, like what is needed to install fog lamps? Thanks a lot!
Hi Ken,
you no need to detach the front bumper to install the DLR lights, just assure you can get the wiring connected to the right place under the hood.
hi, may I know where is the black wire (negative -) source connect?
I can't see clear the black wire located. Thanks.
Hi Victar,
thanks for drop by.
technically the whole car chassis (aka. body) is grounded, which mean you can connect the negative black wire to anywhere of it.
find any suitable screws location under the hood, and connect the your DLR to it, and you are done
Hello Wallace,
Thanks for drop by! I don't put any fuse in between the connection of ignition and DLR.
I've being using the DLR for few years, my DLR only broke down because of water sip into it, but never because of short circuit.
The fuse is to prevent short circuit in the system. The ignition point that I contacted is already equipped with fuse, so we don't need to put another fuse
Hello,
may I know that any additional fuse is used in the connection from ignition to drl? (for positive polarity).
izit safe without an additional fuse?
hope u can help me~.
Pingback: Toyota Vios
Hi Selson! I am glad that you like this DIY of DLR LEDs. Yes, I just insert the + wire into the fuse box as what photo shown. No cutting wire is required
I been looking for this DIY for long time. But i got some question, izzit the + wire just push in the fuse box same with the existing red wire as photo shown?